Search This Blog

Friday, December 30, 2011

Review of 11 in 2011


 Since there is only 1 day left in 2011, I thought I'd do a quick review of the goals I wanted to accomplish this year. 


Finish my pharmacy technician class with at least a 95% average.  I only need an 80% to pass, but I want to do better than that.  Did.  Finished with 98.7%  Also took the certification test in August and passed it. 

~Save money for Christmas presents by October.  I want to be able to buy for more people this year, so H and I are planning on making a joint effort to save better and be prepared for gift buying ahead of time.   Did.  We did much better this year about planning for gifts than in previous years.  

~Be pregnant by the end of the year.  This one may be a long shot though.  We'd like our kids about 2 years apart.  I just have no idea when we feasibly can start TTC for Baby Rebel #2 because of my job situation.  Plus it took us just over a year to conceive Baby Rebel #1, and I'm not going to get my hopes that #2 will be easier.  So we'll play this one by ear. Not.  Was hoping to have good news to share on the New Year, but bad news arrived on the 22nd to spoil that idea.  We'll have to see what 2012 has us store for us.  

~Have a job shortly after getting my certification.  I'm very hopeful that with the internship I'll do and the bonus of being a Certified Pharmacy Technician that gaining employment won't be hard.    Not.  Need to make this more of a priority than it is right now if I ever want to be employed. 

~Lose weight by my class reunion.  I lost about 30lbs after having Baby Rebel, but I have gained quite a bit since high school.  So while I'm realistic that I won't be able to reach my high school weight by August, I would like to lose some more and feel better about myself.  Fail. Did nothing to lose weight.  Now my goal is to lose weight by my sister's wedding next June. 

~For Baby Rebel to have an awesome checkup with his specialist on February 10th.  He'll have another u/s on his liver to make sure the hemangioma on it is still gone.  I'm very hopeful that that appointment will be the last time we have to visit!  Pass, completely clear of hemangiomas by Feb.  All clear in May of the fistula the radiologist saw.  No more specialists and no more ultrasounds.


~To help my H find a better job.  He graduated from college in May 2007 and still doesn't have a "career".  He has jobs that pay our bills.  I would really like to help him get into a job that is long term and he loves.  Complete.  Got a job as security guard at a big hospital in June.  Much better insurance and better pay.  He quit the mall security job when he took the hospital job and quit Meijer in October.  For the first time in over 4 years he is only working 1 job.

~Get the sisters tattoo with my 2 little sisters.  We've been planning this for awhile, and my littlest sister finally turned 18 this past December!  We're getting a Celtic symbol for womanhood.  Completed on June 24th.  We got them on the inside of our left wrists.   We opted to get the first 2 initials of our names around the center.  I think they turned out pretty nice. 
<--Close up of my arm.


~Do something girly for myself.  Be it getting a mani/pedi, or something else.  Do something without Baby Rebel and H that is just for me.  Did.  Got a pedicure at the end of November.  H just told me to go one day, so I did.  And I loved it!

~Update my 101 in 1001, and see what I stand with accomplishing that.  My finish date is March 14, 2012, so I still have some time to work on the list.  I haven't done anymore since my last update.  There are some more updates I need to post, and some that are still in progress.  Finishing all 101 doesn't seem likely to happen. 

~Just enjoy everyday with H and Baby Rebel.  Time is flying and I can't believe that in 8 days I'll have a 7 month old.  So I want to cherish every moment with my 2 guys and make the most of our time as a family of 3. Absolutely have.  And I have photographic proof of everything.  Time flies so I have to enjoy every moment.  

Review- I managed to get through the majority of my goals.  A few were a complete fail, but they aren't anything pressing that really hurts that I didn't finish.  I'll have to think about whether I want to set similar goals for next year.  Or perhaps I should just focus on the weight loss, since it is something that is important to me. 


Photobucket

Wednesday, November 9, 2011

Lasagna-Style Baked Ziti

Source-Real Simple Cookbook


Ingredients
  • 12 oz box of ziti (about 4 cups)
  • 1 Tbsp olive oil
  • 1 large onion, diced
  • 2 cloves garlic, minced
  • 1/2lb lean ground beef
  • kosher salt and black pepper
  • 26oz jar marinara sauce
  • 1 bunch spinach, thick stems removed (about 4 cups)
  • 1/2 cup ricotta (used full 15oz container)
  • 1/2 cup grated Parmesan 
  • 1 cup shredded mozzarella (used 2 cups)
Preparation
  • Heat oven to 400 degrees.
  • Cook the pasta according to the package directions. 
  • Drain the pasta and return to pot.
  • Meanwhile, heat the oil in a large skillet over medium heat.
  • Add the onion and garlic and cook, stirring occasionally, until they begin to soften, 4-5 minutes.
  • Add the beef, 3/4 tsp salt and 1/4 tsp pepper.
  • Cook, breaking up the beef with a spoon until it's no longer pink, 5-6 minutes.
  • Toss the pasta with the meat mixture, marinara sauce, spinach, ricotta, and 1/4 cup of the Parmesan.
  • Transfer to 9x13 baking dish or 4 large ramekins.
  • Sprinkle with mozzarella and remaining 1/4 cup Parmesan.
  • Bake until the cheese melts, 12-15 minutes.
Review & Changes-  This had really good flavor.  I liked the freshness of the spinach even in a baked dish.  Of course the cheese was great.  If anything it could have used a bit more marinara sauce.  An easy meal that tastes good.  I'd make this again.


Photobucket

Monday, November 7, 2011

Southwest Chicken Skillet

Source- Betty Crocker Easy Family Dinners Cookbook

Ingredients
  • 1 Tbsp vegetable oil
  • 1 lb boneless, skinless chicken breasts, cut into 1-inch pieces
  • 1 lb bag frozen broccoli, corn and red peppers (mine also came with cauliflower)
  • 15oz can black beans, rinsed and drained
  • 1 cup thick and chunky salsa (used full 16oz jar)
  • 2 cups coarsely crushed tortilla chips
  • 1 cup shredded Cheddar Cheese
Preparation
  • Heat oil in 10-inch skillet over medium-high heat.
  • Cook chicken in oil 4-5 minutes, stirring occasionally, until brown.
  • Stir in frozen vegetables, beans and salsa.
  • Reduce heat to medium.
  • Cover and cook 6-8 minutes, stirring occasionally, until vegetables are crisp tender.
  • Sprinkle with tortilla chips and cheese.
  • Cover and cook about 2 minutes or until cheese is melted.
Review & Changes- This turned out really good.  My husband was surprised at how much he liked the tortilla chips in it.  Of course in the leftovers the chips weren't crunchy anymore, but they still were good.   I definitely think the recipe needed the full jar of salsa instead of just 1 cup.  I started with just the cup, and it didn't look like enough, so I didn't immediately go to the whole jar.


Photobucket

Wednesday, November 2, 2011

Fudgy Chocolate Chip Toffee Bars

Source- Family Bites via Pinterest

Every once in awhile I get the urge to make a dessert.  We usually have cookies in the house, but sometimes I want something a little different for a sweet treat.  These looked really good and not too hard to make.

Ingredients
  • 1/2 C butter, melted
  • 2 C graham cracker crumbs (32 squares) 
  • 1 8 oz. bag toffee bits
  • 1 roll refrigerated chocolate chip cookie dough
  • 1 12oz. bag chocolate chips
  • 1 14oz. can sweetened condensed milk
  • 1 T butter
  • 1 tsp vanilla extract
Preparation

  • Grease 13x9 baking dish and heat oven to 350.
  • Have the roll of cookie dough sitting out for around 10 minutes to soften up.
  • In a medium mixing bowl, stir together the 1/2 cup of melted butter, 1 1/2 cups of graham cracker crumbs and 3/4 cup of toffee bits.
  • Pour mixture into the greased pan and press evenly until mixture covers bottom of pan. 
  • Refrigerate for around 15 minutes.
  • In a 2 qt saucepan, heat the milk, chocolate chips and the tablespoon of butter over medium heat. 
  • Stir frequently until the chips are melted and the mixture is smooth. 
  • Remove the mixture from the heat and stir in the vanilla extract. 
  • Spread the mixture over the graham cracker crumb mixture.
  • In another medium mixing bowl, break up the cookie dough and stir in the remaining 1/2 cup graham cracker crumbs until blended. 
  • Crumble the mixture evenly over the chocolate layer and the sprinkle the remaining 3/4 cup toffee bits on top.
  • Bake for about 25-35 minutes or until it's golden brown. 
  • Cool completely before cutting, probably around 2 or more hours.
Review & Changes- These are super rich.  Of course that isn't a bad thing, but a small piece goes a long way.  They are an amazing combination of chocolate and toffee.  The crust layer doesn't really get hard so they stay nice and chewy.  Definitely amazing, you should make these!


Photobucket

Tuesday, November 1, 2011

Roasted Vegetables with Rice

Source- Me!

I did have an inspiration for this recipe, but it called for cooking the tomatoes in an aluminum foil pouch on a grill.  Since I don't have an indoor grill or outdoor grill I decided that I'd cook them in the oven, and then I also added a zucchini and squash.  I was making pork loin and knew I needed some sort of side to go with the vegetables, so I opted for rice.  That is how this whole thing came together.

Ingredients
  • 1 zucchini, chopped
  • 1 yellow squash, chopped
  • 2- 12oz bags of cherry tomatoes with stems removed
  • 2 Tbsp olive oil
  • seasoning salt
  • pepper
  • 3 cups uncooked brown rice
  • water for rice, or chicken stock/broth
Preparation
  • Preheat oven to 400 degrees.
  • Cover a cookie sheet with aluminum foil.
  • Place vegetables in bowl.
  • Add oil, salt and pepper
  • Mix until vegetables are well coated.
  • Pour onto covered cookie sheet.
  • Bake in oven about 20 minutes, or until vegetables are well cooked and tomatoes start to pop.  
  • While vegetables are roasting, cook rice according to package directions.  I used minute rice so that I didn't have to wait so long.
  • After rice has finished cooking and set, pour into large mixing bowl.  
  • Add vegetables and any juices that have accumulated.
  • Mix well and serve hot.
Review & Changes- I am a genius!  OK, maybe not really but this recipe was great.  I've never cooked with zucchini or squash but knew that I liked them because of trying them at restaurants in a mixed vegetable medley.  I'm glad I included the rice.  It made the vegetables a little bit more without overpowering them.  Plus having roasted veggies and brown rice as a side instead of a potato made me feel that we were eating healthy.

I'm sure you could change up the veggies or even add in different seasonings, but they aren't necessary.  After this success I will be using zucchini and squash again!


Photobucket

Monday, October 31, 2011

Pork Chops with Creamy Gravy and Vegetables

Source- Pillsbury One-Dish Meals Cookbook

I've made other recipes out of this cookbook.  Every once in awhile I decide that I should cook something out of the cookbooks I own instead of always referencing the internet.  This recipe did not disappoint.

Ingredients
  • 4 bone-in pork loin chops, 1/2 inch thick (used boneless)
  • 1/4 to 1/2 tsp seasoned salt
  • 1/2 cup sour cream
  • 1 10.75oz can condensed cram of celery soup
  • 1/4 to 1/2 tsp dried sage
  • 3 cups frozen cut green beans
  • 1 1/2 cups frozen potatoes with onion and peppers
Preparation
  • Spray large nonstick skillet with nonstick cooking spray.
  • Heat over medium-high heat until hot.
  • Sprinkle pork chops with seasoned salt.
  • Place in skillet.
  • Cook 5-6 minutes or until browned on both sides.
  • Remove chops from skillet, cover to keep warm.
  • In medium bowl combine sour cream, soup and sage, mix well.
  • Pour in skillet and add vegetables.
  • Arrange chops over vegetable mixture, press gently into mixture.
  • Bring to a boil.
  • Reduce heat to medium-low.
  • Cover and cook 10-15 minutes or until pork chops are no longer pink in center and vegetables are tender, stirring occasionally.
Review & Changes- This recipe was really easy to make.  The flavor was really good and you didn't have too much of one thing.  I think this recipe would also work with cream of mushroom soup, but no changes are necessary. 


Photobucket

Monday, October 24, 2011

11 in 2011, 5/6 of the year check-in

Finish my pharmacy technician class with at least a 95% average.  I only need an 80% to pass, but I want to do better than that.  Did.  Finished with 98.7%  Also took the certification test in August and passed it. 

~Save money for Christmas presents by October.  I want to be able to buy for more people this year, so H and I are planning on making a joint effort to save better and be prepared for gift buying ahead of time.   Pretty set.  Got almost $200 in Meijer gift cards set aside and we have plans to save more.

~Be pregnant by the end of the year.  This one may be a long shot though.  We'd like our kids about 2 years apart.  I just have no idea when we feasibly can start TTC for Baby Rebel #2 because of my job situation.  Plus it took us just over a year to conceive Baby Rebel #1, and I'm not going to get my hopes that #2 will be easier.  So we'll play this one by ear.  No luck yet, we've been trying since February.  Probably 3 cycles left till the end of the year.

~Have a job shortly after getting my certification.  I'm very hopeful that with the internship I'll do and the bonus of being a Certified Pharmacy Technician that gaining employment won't be hard.    Not yet.  Need to do better at job searching and have H look over my resume.

~Lose weight by my class reunion.  I lost about 30lbs after having Baby Rebel, but I have gained quite a bit since high school.  So while I'm realistic that I won't be able to reach my high school weight by August, I would like to lose some more and feel better about myself.  Fail. Did nothing to lose weight.  Now my goal is to lose weight by my sister's wedding next June. 

~For Baby Rebel to have an awesome checkup with his specialist on February 10th.  He'll have another u/s on his liver to make sure the hemangioma on it is still gone.  I'm very hopeful that that appointment will be the last time we have to visit!  Pass, completely clear of hemangiomas by Feb.  All clear in May of the fistula the radiologist saw.  No more specialists and no more ultrasounds.


~To help my H find a better job.  He graduated from college in May 2007 and still doesn't have a "career".  He has jobs that pay our bills.  I would really like to help him get into a job that is long term and he loves.  Complete.  Got a job as security guard at a big hospital in June.  Much better insurance and better pay.  He quit the mall security job when he took the hospital job and quit Meijer in the last 2 weeks.  For the first time in over 4 years he is only working 1 job.

~Get the sisters tattoo with my 2 little sisters.  We've been planning this for awhile, and my littlest sister finally turned 18 this past December!  This is the Celtic symbol for sisterhood that the 3 of us will be getting on our lower ankle area.  Not definitive on the location.   Completed on June 24th.  We got them on the inside of our left wrists.   We opted to get the first 2 initials of our names around the center.  I think they turned out pretty nice. 
<--Close up of my arm.


~Do something girly for myself.  Be it getting a mani/pedi, or something else.  Do something without Baby Rebel and H that is just for me.  Not yet.

~Update my 101 in 1001, and see what I stand with accomplishing that.  My finish date is March 14, 2012, so I still have some time to work on the list.  I haven't done anymore since my last update.  There are some more updates I need to post, and some that are still in progress.  Finishing all 101 doesn't seem likely to happen. 

~Just enjoy everyday with H and Baby Rebel.  Time is flying and I can't believe that in 8 days I'll have a 7 month old.  So I want to cherish every moment with my 2 guys and make the most of our time as a family of 3. Absolutely have.  And I have photographic proof of everything.  Time flies so I have to enjoy every moment.  


Overall- Very happy with the fact that I'm making most of my goals.  Feels good to know I'm accomplishing what I said I wanted to back at the beginning of the year.


Photobucket

Monday, October 17, 2011

Chicken Enchilada Casserole

Source- Joelen's Culinary Adventure's

Jolelen does not disappoint.  When I see something on her blog that I think LOOKS good, I know it's going to TASTE great!  

Ingredients
Chicken:
6 skinless, boneless chicken breast halves
1 tablespoon chili powder
1/4 teaspoon garlic powder
1/4 teaspoon onion powder
1/4 teaspoon crushed red pepper flakes
1/4 teaspoon dried oregano
1/2 teaspoon paprika
1 1/2 teaspoons ground cumin
1 teaspoon sea salt
1 teaspoon black pepper

Casserole Sauce:
1 (16 ounce) container sour cream
1 (16 ounce) jar chunky salsa
1 1/2 cup cream of chicken soup (I used homemade, but you can use store bought)
1/4 cup diced onion
3/4 cup canned black beans, drained
1 cup canned sweet corn, drained
2 plum tomatoes, seeded, chopped
6 (12 inch) corn tortillas, cut into strips
4 cups shredded Cheddar cheese
2 stalks green onion, thinly sliced for garnish

Preparation
  • Preheat oven to 350 degrees F (175 degrees C).  
  • Combine the spices in a small bowl and season the chicken breasts. 
  • Place on a baking sheet and bake in the preheated oven until cooked through, about 20 minutes. 
  • Remove from oven and allow to cool until able to handle by hand. 
  • Once cooled enough to handle, shred chicken. 
  • Set aside until ready to layer the casserole. 
  • In a large bowl, mix sour cream, salsa, cream of chicken soup, onion, black beans, corn and tomatoes.  
  • Layer the bottom of a deep casserole dish or 9x13 inch baking dish with 1/3 tortilla strips. 
  • Top with 1/3 cooked chicken, 1/3 bean and corn mixture and 1/3 cheddar cheese. 
  • Repeat layering with remaining ingredients.  
  • Bake in the preheated oven 20 to 30 minutes, or until golden and bubbly. 
  • Let stand about 10 minutes before serving. Garnish with green onions

Review & Changes-  I loved this recipe.  Cheesy and great flavors, can't miss.  Definitely will make again, and nothing need to change.


Photobucket

Thursday, October 13, 2011

Ranch House Crock Pot Pork Chops with Parmesan Mashed Potatoes

Source- Real Mom Kitchen via Pinterest

Are you on Pinterest??  I joined a couple months ago and started pinning different recipes.  I finally decided to go ahead and make one, and boy am I glad I started with this one.  Hopefully my other pins are as successful and tasty as this one turned out!!

Ingredients
  • 6 pork chops, 1/2 inch thick
  • 1 packet dry Ranch Dressing Seasoning
  • 10 oz can Cream of Chicken Soup
  • 4 lbs peeled, cubed potatoes
  • 5 Tablespoons real butter
  • 1 cup fresh grated Parmesan cheese
  • 6 cloves roasted garlic (directions are below)  (omitted, used garlic powder)
  • 1- 1 1/2 Cups warm skim milk (any milk will do, I used 2%)
  • 1 Tablespoon salt, or to taste
  • 1 teaspoon fresh cracked black pepper, or to taste
Preparation
  • Place pork chops, Ranch seasoning and soup into a medium sized crock pot over high heat for 4 hours or low heat for 6 hours. 
  • Place potatoes into a large pot of cold water. 
  • Place onto stove top over high heat and bring to a boil. 
  • water is boiling, cook for 10-12 minutes or until potatoes are fork tender. 
  • Drain and transfer to the work bowl of a stand or electric mixer. 
  • Mix on low until potatoes are mashed then add butter, Parmesan, garlic, milk, salt and pepper. Season to taste if needed. For thinner mashed potatoes add more milk, slowly until your desired consistency.
  • Scoop mashed potatoes onto serving plates and top with pork chops and soup gravy from crock pot. I put a little parsley on top to serve.
Roasted Garlic
Preheat oven to 350 degrees F. Place bulb of garlic with skins on, wrap lightly in tin foil and bake for 1 hour. Remove from foil and let cool for 15 minutes. Remove garlic from skins, place in a bowl and mash with a fork until completely mashed. Set aside. One garlic bulb will have around 12 cloves.

Review & Changes-  This recipe was really good.  The pork had awesome flavor and was so tender it practically fell apart.  And the mashed potatoes alone were great, and with the soup mixture from the pork over them they were fabulous.  This recipe is so easy to throw together that I will definitely make again.  No changes need to be made.


Photobucket

Wednesday, October 12, 2011

Chicken & Broccoli

Source- Lauren's Kitchen

I love making homemade takeout.  Especially when it is something that I haven't gotten when we go out.  Trying something new is always nice. 


Ingredients

  • 3 tablespoons cornstarch, divided
  • 1/2 cup water, plus
  • 2 tablespoon water, divided
  • 1/2 teaspoon garlic powder
  • 1 lb boneless, skinless chicken thighs or breasts, cut into thin 3-inch strips
  • 2 tablespoons vegetable oil, divided
  • 4 cups broccoli florets
  • 1 small onion, cut into wedges
  • 1/4 cup chicken broth
  • 1/3 cup soy sauce
  • 2 tablespoons brown sugar
  • 1 teaspoon ground ginger
  • hot cooked rice
Preparation

  • In a bowl, combine 2 tablespoons cornstarch, 2 tablespoons water and garlic powder until smooth. 
  • Add chicken and toss. 
  • In a large skillet or wok over medium high heat, stir-fry chicken in 1 tablespoon oil until chicken reaches desired doneness; remove and keep warm. 
  • Stir-fry broccoli and onion in remaining oil for 4-5 minutes. If necessary, deglaze with about 1/4 cup chicken broth.
  • Return chicken to pan. 
  • Combine soy sauce, brown sugar, ginger and remaining cornstarch and water until smooth; add to the pan. 
  • Cook and stir for 2 minutes. 
  • Serve over rice.
 Review & Changes- This recipe was really good.  I love making a sauce with my own ingredients instead of just buying a ready-made one from the store.  Nothing needs to be changed.


Photobucket

Tuesday, October 11, 2011

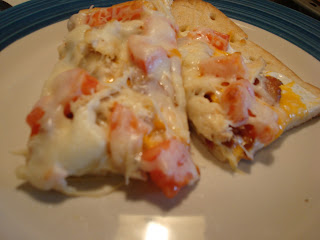
Chicken Bacon Ranch Pizza

Source- Stephanie Cooks and Lauren's Kitchen

Bookmarked this recipe twice.  First when Stephanie made it, then again when Lauren made it.  So obviously I really wanted to make it!  :)

You'll notice in the picture the slices don't have green onions, but the whole one does.  I made 2 pizzas and cut up the first one before I remembered the green onions.  So I took pictures too soon.  Oh well. 

Ingredients
  • 1 batch of pizza dough
  • Olive oil
  • 1/4 cup ranch salad dressing
  • 4 ounces grilled chicken, diced small
  • 3 slices of bacon, cooked crisp and diced small
  • 1 tomato, seeded and diced small
  • 2-3 green onions, chopped
  • 3/4 cup shredded cheddar cheese
  • 1/4 cup shredded mozzarella cheese
Preparation

  • Preheat the oven to 450.
  • Prepare your pizza dough, leaving a thicker edge around the side for the crust. Prepare it on either parchment paper or on a pizza peel topped with corn meal. 
  • Drizzle olive oil lightly over the crust and rub it all over the dough, over the edges as well. 
  • Bake for 7 minutes.
  • Top with the ranch salad dressing, spreading evenly over the crust.
  • Next, arrange your chicken, bacon, and tomato evenly over the dressing.
  • Top with the cheddar cheese. Then sprinkle the mozzarella evenly over top.
  • Transfer the pizza to the stone. 
  • Bake 10-12 minutes or until the cheese is melted and the crust is golden.
  • Top with the green onions as soon as you pull it from the oven. Serve hot.
Review & Changes- This turned out really good.  Enough different flavors to make every bite really good. No changes need to be made.


Photobucket

Monday, October 10, 2011

Easy Chicken & Cheese Enchiladas

Source- Campbell's Kitchen

Ingredients
  • 1 can (10 3/4 ounces) Campbell's® Condensed Cream of Chicken Soup (Regular or 98% Fat Free)
  • 1/2 cup sour cream
  • 1 cup Pace® Picante Sauce
  • 2 teaspoons chili powder
  • 2 cups chopped cooked chicken
  • 1/2 cup shredded Monterey Jack cheese
  • 6 flour tortillas (6-inch), warmed
  • 1 small tomato, chopped (about 1/2 cup)
  • 1 green onion, sliced (about 2 tablespoons) 
  • Ingredient Note: Stir 1/2 cup canned black beans, drained and rinsed, into the chicken mixture before filling the tortillas, if desired.  <- I missed this so I didn't add, but I would have liked it this way too.

Preparation

1. Heat the oven to 350°F. Stir the soup, sour cream, picante sauce and chili powder in a medium bowl.

2. Stir 1 cup soup mixture, chicken and cheese in a large bowl.

3. Divide the chicken mixture among the tortillas. Roll up the tortillas and place seam-side up in a 2-quart shallow baking dish. Pour the remaining soup mixture over the filled tortillas. Cover the baking dish.

4. Bake for 40 minutes or until the enchiladas are hot and bubbling. Top with the tomato and onion.
 

Review & Changes-  I love enchilada recipes.  Especially when they don't call for red sauce.  Leftovers of this did not last long.  Amazing!!  The only change I would make is to add the black beans that are mentioned in that note above that I missed the first time. 


Photobucket

Wednesday, September 28, 2011

Peach Whiskey Barbecue Chicken

Source- The Pioneer Woman

So I have a fifth of Jack Daniels in my house.  We aren't whiskey drinkers.  I bought it for that TGI Friday's Special Sauce recipe, but with it only using a couple teaspoons there was plenty left.  So even though I'm not a huge fan of chicken thighs I decided to try this recipe since the sauce sounded so good, and it could use up some of that whiskey. 


Ingredients
  • 12 whole Chicken Thighs, Bone-in, Skin-on
  • 2 Tablespoons Olive Oil
  • 2 Tablespoons Butter
  • 1 whole Yellow Onion, Diced
  • 1-½ cup Whiskey
  • 12 ounces, fluid Barbecue Sauce
  • 1 jar Peach Preserves
  • ½ cups Water
  • 2 Tablespoons Worcestershire Sauce
  • 4 cloves Garlic, Peeled
  • 3 whole Green Onions, Sliced Thin

Preparation
  • Preheat oven to 300 degrees.
  • Heat oil and butter in a heavy pot over medium-high heat. 
  • Place chicken thighs, four at a time, in the pot, skin side down. 
  • Brown both sides, then remove to a plate and repeat until all chicken is browned.
  • Pour off half the grease, then return pan to stove. 
  • Add onions to pan and stir, cooking for 2 minutes. 
  • Pour whiskey into the pot, being very careful if you’re using an open flame. 
  • Stir and scrape the bottom of the pan, allowing whiskey to reduce for a minute or two. 
  • Pour in barbecue sauce, peach preserves, water, and Worcestershire sauce. 
  • Throw in garlic cloves. 
  • Stir until combined, then return chicken to the pot, skin side up. 
  • Cover and put pot in oven.
  • Cook for 1 1/2 hours, then remove from oven.
  • Serve pieces of chicken over a big pile of smashed potatoes. 
  • Sprinkle sliced green onions over the top.
Review & Changes- I'm not usually a dark meat person.  But this recipe was excellent.  The meat just falls off the bone.  And the sauce is awesome.  Especially has a sort of gravy on the mashed potatoes. 


Photobucket

Tuesday, September 27, 2011

Spinach & Artichoke Tortellini

Source- Stephanie Cooks


I'm not having any luck finding the picture for this recipe.  :(

Ingredients
  • 1 package of tortellini
  • 2 cups of fresh spinach, chopped
  • 4 ounces frozen artichoke hearts, defrosted and chopped
  • 2 cups tomato sauce (more or less according to taste)
  • 1 cup pecorino romano cheese
Preparation
  • Preheat the oven to 350.
  • Cook the tortellini according to package instructions. Drain and return to the pot.
  • Add the spinach, artichoke hearts, 1/2 cup cheese, and sauce to the pot. Stir well.
  • Transfer to an oven safe dish. Top with the remaining 1/2 cup cheese.
  • Bake for 25 minutes or until the sauce is bubbling. 
Review & Changes- A vegetarian recipe that comes together very easily.  After the last time I used artichoke hearts I learned a lesson.  To chop the artichoke hearts up into small pieces in order for the taste not to overwhelm me and I just end up picking the pieces out and not eating them. 


Photobucket

Monday, September 26, 2011

Cheeseburger Macaroni

Source- Another Day Stronger

Ingredients
  • 1 lb lean hamburger meat 
  • 1 pkg taco seasoning
  • 1 can Rotel tomatoes and green chilies (or petite diced tomatoes)
  • 2 cups beef broth (or water)
  • 1 cup elbow macaroni
Cheese Sauce
  • 2 Tablespoons butter
  • 2 tbsp flour
  • 3/4 cup milk
  • 1 cup shredded cheddar cheese
  • 1/2 tsp salt
  • 1/2 tsp pepper

Preparation
  • Brown and drain hamburger meat. 
  • Stir in taco seasoning, Rotel, beef broth, and macaroni. 
  • Heat to boiling. 
  • Reduce heat and cover pan. 
  • Simmer 12-14 mins until macaroni is tender.
  • Meanwhile, make the cheese sauce….
  • Melt the butter in a saucepan. 
  • Whisk in the flour and cook, whisking for 5 minutes until fragrant and light brown in color. 
  • Whisk in the milk and bring to a boil. 
  • Whisk until smooth and thickened. 
  • Remove from heat and stir in the shredded cheddar cheese until melted. 
  • Add the salt and pepper to the cheese sauce. 
  • Pour the cheese sauce over the hamburger mixture. 
  • Stir gently to combine.
Review & Changes-  This was really easy to make.  I worry about cheese sauces, but this one came together nicely.  I liked the little bit of kick the green chilies gave.  I will definitely make this again.  Leftovers did not last long in our house. 


Photobucket

Friday, September 23, 2011

Pineapple Fried Rice

Source- Stephanie Cooks

Ingredients
  • 1 tsp. canola oil
  • 1/2 small yellow onion, diced small
  • 1 bell pepper, diced small 
  • 3 ounces chicken, diced small
  • 2 cups cooked white rice, day old is best
  • Soy sauce
  • 1/2 tsp. garlic powder
  • 1/4 cup cashew nuts
  • 1/4- 1/2 cup pineapple chunks- diced small
 
Preparation
  • Pour the oil in a nonstick skillet. Heat over medium heat.
  • Add the onion and peppers, stirring well to soften, about 5 minutes.
  • Stir in the diced chicken. Stir regularly, until cooked.
  • Remove the chicken/veggie mixture to a dish.
  • Add the rice to the skillet. Allow to heat. Do not stir.
  • After about 3 minutes, stir, and allow to sit again for about 3 minutes.
  • Add the soy sauce to taste (use less, you can always add more, you want it to coat but not soak the rice). 
  • Add the garlic powder. Stir well.
  • Add in the cashews and the pineapple
  • Return the chicken/veggies to the pan. 
  • Stir well and allow to heat together for about 4-5 minutes.
  • Serve hot.
Review & Changes-  This was really good.  Simple ingredients that go well together.  Not much else to say.  Definitely would make this again.

Photobucket

Thursday, September 22, 2011

Asian Turkey Meatballs with Lime Sesame Dipping Sauce

Source- Lauren's Kitchen

I like trying to expand my comfort zone.  Using ground turkey is one way that I have done so.  When I can mix it with ingredients that I know I'll enjoy like scallions and garlic I'm willing to try something new. 

Ingredients

  • 1/4 cup panko crumbs
  • 1-1/4 lbs 93% lean ground turkey
  • 1 egg
  • 1 tbsp ginger, minced
  • 1 clove garlic, minced
  • 1/2 tsp salt
  • 1/4 cup chopped fresh cilantro  (omitted)
  • 3 scallions, chopped
  • 1 tbsp low sodium soy sauce
  • 2 tsp sesame oil
Dipping Sauce
  • 4 tbsp low sodium soy sauce
  • 2 tsp sesame oil
  • 2 tbsp fresh lime juice
  • 2 tbsp water
  • 1 chopped fresh scallion

Preparation
Preheat oven to 500°F.
Mix ground turkey, panko, egg, salt, scallions, cilantro, 1 tbsp soy sauce, and 2 tsp oil and mix with your hands until combined well. Shape 1/4 cup meat mixture into a ball and transfer to a baking dish. Repeat with remaining mixture. Bake until cooked through, about 15 minutes.
For the dipping sauce mix together lime juice, water, soy sauce, and remaining 2 teaspoons of oil in a bowl. Add scallions.
Transfer meatballs to a serving dish. Stir sauce, then drizzle meatballs with 1 tablespoon sauce.
Serve meatballs with remaining sauce. Chances are you won't use all the dipping sauce.

Review & Changes-   I was not that impressed with this recipe.  The meatballs were good, especially being made with turkey.  But the sauce was not something I liked, and so plain meatballs wasn't that great.  Can't see myself making this recipe again. 


Photobucket

Wednesday, September 21, 2011

Santa Fe Chicken

Source- Messy Bessy Cooks

This recipe is from a fellow Nestie that I've known for years, and finally started her own blog.  This is the first recipe of hers that I've made, but after the success here it won't be the last.

No picture since I forgot to take one.  :(

Ingredients
  • 24 oz (1 1/2) lbs chicken breast
  • 14.5 oz can diced tomatoes with mild green chilies 
  • 15 oz can black beans
  • 8 oz frozen corn
  • 1/4 cup chopped fresh cilantro  (omitted)
  • 14.5 oz can fat free chicken broth 
  • 3 scallions, chopped
  • 1 tsp garlic powder
  • 1 tsp onion powder
  • 1 tsp cumin
  • 1 tsp cayenne pepper (to taste) (used 1/2 tsp red pepper flakes) 
  • salt to taste
  • 2 cups brown rice
Preparation
  • Combine chicken broth, beans, corn, tomatoes, pepper garlic powder, onion powder, cumin, cayenne pepper and salt in the crock pot. 
  • Season chicken breast with salt and lay on top. 
  • Cook on low for 10 hours or on high for 6 hours. 
  • Half hour before serving, remove chicken and shred.
  • Return chicken to slow cooker and stir in. 
  • Adjust salt and seasoning. 
  • Serve over rice.
Review & Changes-This turned out really good, and I would make it again.  Especially since everything gets thrown together in a slow cooker.  Can't get much easier than that!

Photobucket

Thursday, September 15, 2011

Asian Chicken Pizza

Source- Lauren's Kitchen

Ingredients

  • Pizza dough
  • 5 ounces of chicken, chopped into small pieces
  • 1/2 tsp. red pepper flakes (less or more depending on how hot you want it)
  • 3 cloves garlic, minced
  • 1/4 cup low-sodium soy sauce
  • 2 1/2 tbsp. honey
  • 3/4 cup rice wine vinegar OR apple cider vinegar  (used cider vinegar)
  • 1 cup mozzarella cheese
  • Olive oil
  • Sesame seeds (optional)
  • 2 tbsp. sliced green onion
Preparation
  • Preheat the oven to 450.
  • Combine the red pepper flakes, garlic, soy sauce, honey, and vinegar. Stir well, set aside.
  • In a small skillet cook the chicken. Remove from the pan and set aside.
  • Pour the sauce mixture into the pan. Heat over medium heat until it thickens and becomes syrup like, about 10 minutes. Add the chicken, toss well.
  • Form the dough. Top with a drizzle of olive oil, rubbing to coat the dough.
  • Top with the chicken/glaze mixture. Make sure it's evenly coating the dough.
  • Top with the cheese and sprinkle with sesame seeds if using.
  • Bake 10-12 minutes. Top with green onion. Serve hot.
 Review & Changes-  I really wanted to like this recipe.  It had so much potential.  But while cooking the sauce I tasted it before mixing the chicken in, and it was really bitter due to the cider vinegar.  I ended up adding more honey and even a bunch of brown sugar before I was satisfied that the sauce wouldn't completely ruin the pizza. 

The overall taste was OK.  I just wasn't that impressed and can't see myself making this recipe again. 


Photobucket

TGI Friday's Jack Daniel's Secret Sauce

Source- BBQ Sauce Recipes Website

Let me start this post by saying that my husband LOVES the Jack Daniel's Sauce at TGI Friday's.  He's not alone though, that stuff is really good.  When I mentioned that I could find a copycat recipe online so that we could have this anytime he was on board with that decision.  So I used the ever reliable Google and found this recipe.  I actually found it at more than 1 site, so it is easy to find.

Ingredients
  • 1 head garlic
  • 1 teaspoon olive oil
  • 2/3 cup water
  • 1 cup pineapple juice
  • 1/4 cup Kikkoman's teriyaki sauce (used La Choy Teriyaki)
  • 1 teaspoon soy sauce
  • 1 1/3 cups dark brown sugar
  • 3 teaspoons lemon juice
  • 3 teaspoons minced white onions
  • 1 teaspoon Jack Daniels Whiskey
  • 1 teaspoon crushed pineapple
  • 1/4 teaspoon cayenne pepper (used red pepper flakes)
Note- I doubled everything except the garlic to make lots of this sauce.  Doubling it used pretty much the whole roasted garlic.
    Preparation
    To roast the garlic:
    1. Cut about 1/2” off the top of the garlic.
    2. Cut the roots so that the garlic will sit flat.
    3. Remove the papery skin from the garlic, but leave enough so that the cloves stay together.
    4. Put garlic in a small casserole dish or baking pan, drizzle with olive oil and cover with a lid or foil.
    5. Bake in a preheated 325 degree oven for 1 hour.
    6. Remove and let it cool until you can handle it.
    For the Glaze:
    1. Combine water, pineapple juice, teriyaki sauce, soy sauce and brown sugar in a saucepan over medium high heat.
    2. Stir occasionally until mixture boils, then reduce heat to simmer.
    3. Add remaining ingredients to pan and stir.
    4. Squeeze out 2 t of roasted garlic and whisk to combine with pan mixture.
    5. Let simmer for 35-45 minutes or until sauce has reduced by 1/2 and is thick and syrupy.
    6. Make sure it doesn’t boil over.
    7. To use, grill meat until almost done, then use the glaze otherwise it will burn.
    Review & Changes-Amazing!!  This is a real deal copycat.  We put this on both chicken and beef burgers.  There are lots of possibilities.  It keeps and re-warms really well.  And with doubling it there were plenty of leftovers so I didn't want to remake it right away since it does take a bit of time.  H will not let me stop at just making this once!

     
    Photobucket

    Wednesday, May 25, 2011

    Chili & Cheese Macaroni

    Source- Joelen's Culinary Adventures

    Somehow I failed to take a picture of this recipe.  In reality I could just post a picture of the goulash that my family makes and really you'd never know the difference.  :)

    Ingredients
    • table salt
    • 1/2 pound elbow macaroni (about 2 cups uncooked pasta)
    • 3 tablespoons vegetable oil
    • 1 1/2 pounds ground beef (85% lean)
    • 2 medium onions, chopped
    • 1 red bell pepper, stemmed, seeded and chopped (used green pepper)
    • 6 garlic cloves, minced
    • 1 1/2 tablespoons chili powder
    • 1 tablespoon ground cumin 
    • 1 (28 oz) can crushed tomatoes
    • 1 (14.5 oz) can diced tomatoes
    • 1 tablespoon light brown sugar
    • 12 oz Colby Jack cheese, shredded (about 2 1/2 cups) (used 16oz)
    Preparation
    • Preheat the oven to 400 degrees.
    • Bring 4 quarts water to a boil in a large pot over high heat. 
    • Stir in 1 tablespoon salt and add dry macaroni; cook until al dente. 
    • Reserve 3/4 cup pasta water and drain pasta. Transfer to a large bowl and set aside.
    • Using the same large pot, wipe dry and heat over medium heat. 
    • Add 1 tablespoon oil and heat until shimmering. 
    • Add ground beef and break it up in pieces to brown. 
    • Once browned, remove from pot and discard drippings. Set beef aside. 
    •  Add remaining oil to the same large pot and return to medium heat until shimmering.
    • Add onions, garlic, red pepper, chili powder, and cumin; cook, stirring occasionally, until vegetables are softened and begin to brown. 
    • Add the crushed tomatoes, diced tomatoes, brown sugar, reserved 3/4 cup pasta water and beef to the pot. 
    • Bring to a simmer and cook for 20 minutes, stirring occasionally until flavors have blended. 
    • Stir in the cooked pasta, 1/2 cup of shredded cheese and season with salt and pepper to taste.
    • Transfer mixture to a 9x13 baking dish and smooth over with a spatula. 
    • Bake in the preheated oven for 30-35 minutes or until the mixture is hot and bubbling.
    • Remove from oven and sprinkle the top of the dish with the remaining shredded cheese. 
    • Return the dish once again in the oven and bake for 5-10 minutes until the cheese begins to melt and brown. 
    • Cool for 10 minutes before serving. 
    Review & Changes- As stated above this recipe is really similar to the goulash my family makes.  The only difference is the addition of the chili powder and cumin.  That combination and all that cheese makes this a really good meal.  This recipe makes a lot, so leftovers are really good too. 


    Photobucket

    Tuesday, May 24, 2011

    Ginger Spicy Chicken

    Source- Campbell's Kitchen

    Ingredients
    • 1 can (about 20 ounces) pineapple chunks in juice
    • 1 tablespoon cornstarch
    • 1 tablespoon sugar
    • 1/2 teaspoon ground ginger
    • 2 teaspoons soy sauce
    • 1/2 cup Pace® Picante Sauce
    • Vegetable cooking spray
    • 2 medium green peppers or red pepper, cut into strips (about 3 cups)
    • 1 pound skinless, boneless chicken breasts, cut into strips
    • 4 cups hot cooked rice, cooked without salt
    • Fresh parsley for garnish (omitted)
    Preparation
    • Drain the pineapple, reserving the juice. 
    • Stir the cornstarch, sugar, ginger, soy, picante sauce and reserved pineapple juice in a small bowl until it's smooth. Set the mixture aside.
    • Spray a 10-inch skillet with cooking spray and heat over medium heat for 1 minute. 
    • Add the peppers and stir-fry until they're tender-crisp. Set them aside.
    • Remove the pan from the heat. 
    • Spray it with cooking spray and increase the heat to medium-high. 
    • Add the chicken in 2 batches and cook until it's well browned and cooked through, stirring often. Set the chicken aside.
    • Stir the cornstarch mixture and add it to the skillet. 
    • Cook until the mixture boils and thickens, stirring constantly. 
    • Stir the pineapple in the skillet. 
    • Return the chicken and the peppers to the skillet and heat through. 
    • Serve over the rice. Garnish with the parsley.
    Review & Changes-This had amazing flavor.  You may be skeptical considering you're adding picante sauce which is like salsa to an Asian dish, but it just works.  Leftovers did not last long in our house!!  Make this!


    Photobucket